Email theblondeprep@gmail.com with questions, comments, or concerns. Powered by Blogger.
Showing posts with label instagram. Show all posts

This Week's Top 10: BLM


1. This Week's Top 10 is dedicated to people of color and the Black Lives Matter movement. There simply is nothing more prevalent right now than learning how we can all educate and inform ourselves on how to be better, do better, and most importantly, support and stand with the black community.

2. I shared on my Instagram feed my favorite gals of color who I love following. Some are new-to-me accounts, others I've been following for a while, but nonetheless, all of these creators have fabulous feeds that are definitely worth checking out. I'd love to hear any of your favorite black content creators to follow! All about diversifying my feed.

3. I listened to this week's episode of Gals on the Go podcast (one of my faves) featuring Chloe Coriolan, who shared her experience as a woman of color and had a great conversation about covert/overt racism, microaggressions, and more. Highly recommend!

Four IG Accounts Inspiring Me Right Now

photo via Sakara

With everything going on right now, I've been trying to distract myself as much as possible and focus on the things and people who give me good, positive vibes only. I've done some Instagram purging lately and have been completely inspired by the following four women! I am very excited to share this little round-up today because everyone on this list is just brightening my quarantine with their content so much! If you enjoy this post, let me know, as I would love to share more inspiring people!!

Scrolling Back Through My Instagram


This post could not be more random, but I feel like I can't possibly be the only person that gets nostalgic while scrolling back through old Instagram posts. Especially in the summer, scrolling back reminds me of days when the only things I had planned were my daily water ballet (aka synchronized swimming) class each morning, bike rides with friends, and afternoons at the pool. It's not only the photos that remind me of great memories, but the way I edited them and the random things I posted are pretty funny. Captions were weird, and the whole point of Instagram was just to share what you are up to. UGH!!! Can Instagram please just go back to being the way it once was!!!

Shop My Insta Stories


I have been getting a lot of Instagram DM's recently asking for links to items I share on my Insta Stories. I love getting messages, comments, and questions, so I'm always looking for ways to actually be helpful and useful in my responses! I used to be able to use the swipe up feature on Insta stories to easily link to products, but it no longer works for me. My easy solution: I am rounding up the products from recent shoppable posts all in one place... keep scrolling!

How I Edit My Instagram

I've done a few posts before on how I edit my Instagram photos, one in 2014 and one in 2015, but after a few requests recently, I figured it would be a good time to update you all on my process! Consider this my 2016 guide to how I edit my Instagram :)

I usually feel like, in general, my photos are a little "over-edited", but I find that going through the same process for every photo really helps make my feed look cohesive and consistent. I guess there are pros and cons to over-editing! I use two different photo-editing apps: Snapseed and VSCO cam. In general, most of my photos are taken using the "square" camera option on my iPhone 6s!


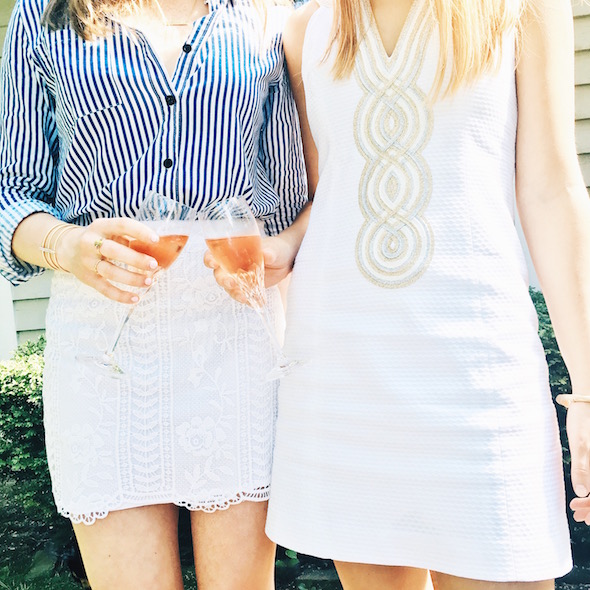
Let's use this photo as an example for how my editing process goes. This is the original picture, which was taken outside in semi-shaded/shadowy light with the square camera option on my iPhone.


The first thing I do is upload my photo to Snapseed, where I go into "Tune Image" and then mess around with all of the options until my photo looks how I want it. Generally this mess raising the brightness and contrast, adjusting highlights/shadows/saturation and occasionally the ambience, and then I typically lower the warmth. One special feature about Snapped that I actually use a ton, but just not for this particular photo, is the "selective adjust" tool which allows you to pick just a small section or area of a photo and adjust the brightness, contrast, and saturation for that area only. That is especially helpful when I post pictures where the background only or just one corner or shadow needs to be fixed, but not the whole photo.


Next, I upload the new photo to VSCO cam. My most used filter is HB2, but sometimes I will use HB1 or maybe even A6 or C1. Then, if necessary, I adjust the photo a little more to work with the filter... the filters can be pretty obvious too so I usually bring them down from 12 to 6 or 7.


Finally, I upload the photo to Instagram! Here I usually brighten the photo just a little more, adjust or rotate the photo if necessary, and usually I'll bring down the warmth just a little bit. Sometimes, too, I really like using the "lux" tool at the top!


And that's it! How do you edit your Instagram photos? Any favorite apps or tricks?
xoxo

How I Edit My Insta Pics

Almost exactly a year ago I wrote a post about just this same thing (read that here)! My Instagram has grown quite a bit in this last year, and I am becoming more proud of my feed everyday... or, at least each time I post. I have gotten a few requests to share how I edit my pictures, so today I'm going to let out a few of my secrets! Sometimes I feel like my pictures look a little too "over-edited" when they finally wind up on Insta, but it's all about perspective- no one else has seen the originals except me, so I just have to remember that; it can be hard to tell everything I really did to get the perfect pic!

Here is one of my averagely edited pictures. A lot of my photos start off a little yellow-ish and dark and fuzzy. I tend to take my shots without very good lighting (#badhabit) and so they aren't always as high quality as I would like. I usually take them on my square camera for the iPhone 5S so I can make sure I fit everything into my shot to avoiding having too many problems when it comes to cropping it for Insta.. I think that's just the worst.


SO, this is the original. Not too pretty, right? I took this picture on my desk with my iPhone around noon, probably with my shades open in my room but my lights were off.

Let me share what I do to get this picture insta ready!

I upload the picture to VSCOcam first. This method is basically what I do for every picture...

1 // I raise the exposure and contrast, decrease the temperature, and sharpen just a little bit.
2 // I usually use F2 as my filter on VSCO, but occasionally I'll use S3 if it's a really dark picture, and then I'll save that and reupload it to use F2. I like F2 because it makes your pictures look very "Amy Stone-esque" and brightens them and makes them cooler without overdoing it. I rarely, however, set the filter all the way to 12, which is what VSCOcam automatically does when you apply a filter. I usually keep the filters at 7 or below, and I have found that being consistent with editing really helps your feed flow.
3 // I save the picture on VSCO and then go to Snapseed where the real magic happens.

This is the picture after VSCO, before Snapseed... 


So at this point the picture is a lot more appealling, but for this one is particular it still looks a little fuzzy, right? I like to make my pictures as crisp as possible, so that's what Snapseed is great for! For pictures that don't have great coloring, especially background coloring, Snapseed is best known for it's ability to let you select just a certain area of a picture and brighten/contrast/saturate that specific area- it's amazing. However, another tool I love on Snapseed is the automatic edit. This automatically corrects the color and contrast of the image and it's amazing. 

4 // I automatically edit the image on Snapseed
5 // If there are any strangely colored areas or shadows I brighten/edit them with the selective adjust tool on Snapseed
6 // When I'm all done editing I crop/straighten the image and send it off to Instagram
7 // Usually my image is good by now, but I'll occasionally brighten it, or bump up the contrast, or lower the temp on Instagram before I share the pic. The brightness tool on Instagram is really great, in my opinion. My favorite thing about the instagram editing tools, however, is the adjusters under the rotation tool. Seriously, these are amazing and a total game-changer for aerial pictures. The vertical and horizontal adjusters just cannot be beat.

...And that's it! It seems kind of tedious, but I love how my pictures turn out and I think it's super easy once you get the hang of it! A lot of the steps can be skipped, too, if you just take your shots in natural, good, quality lighting :) Here's the final!!


What do you think?

How do you edit your pictures? Any apps you'd recommend? I'm all ears- there's always room for improvement! Follow me on Instagram here @theblondeprep!
xoxo

Stripes & Peonies Instagram Prints for Sale

One of my best blogging friends, Gracey, has one of the best instagram feeds out there. I'm telling you- bright images edited to a T, crisp colors and fun scenery make for some very delightful eye candy on the platform. Oh, and the best part? You can now order a few of her snaps online right here.


All 12 prints come bundled up with striped washi tape all for just $24! Absolutely gorgeous and perfect for the holidays...

Life goal: learn how to make my insta half as pretty as hers! The sunglasses snap has got to be my favorite. Tell me, what's yours?

I know I'll be ordering a set soon ;)
xoxo

Instagram vs. What Was Really Happening

I read this article the other day where a girl shared pictures from her Instagram and said what it looked like vs what was really going on... it was hilarious. I think it's so easy to feel like everyone lives a fabulous life on insta and so funny to hear about what they really had going on! Here's a peek into my feed:


What it looks like... I curled my hair for Father's Day and put on a nice outfit for brunch so I could take a quick snap before running out the door to meet my dad and celebrate.

What was really happening... My hair looked disgusting that day so it was in a a ponytail which is why it looks so short. In fact, I don't know how to curl my hair and it was so gross that I curled it with my fingers and stood in front of my closet door to get a decent picture. I don't even remember what I did on Father's Day, and I probably slept in that shirt.


What it looks like... Ahh, arrived at NYC and hanging out around Columbus Circle. Entered the shops and got a cool picture of the circle from my view inside.

What was really happening... I was in J. Crew at the shops on Columbus and I almost fell down the stairs / ran into someone trying to get this picture. I'm pretty sure they thought I was insane and after taking the picture I proceeded to knock over a pair of shoes.


What it looks like... Caroline and I casually spent an afternoon trying to make macarons. They didn't turn out perfect, but they were still delicious! Oh, and we have the same shirt too, isn't that funny? We always look cute when we bake because we are cute people with great lives. After all, doesn't everyone make macarons in June?

What really happened... We had to make macarons for a guest post for Gracey that never even got drafted because they turned out so horrible I almost threw up. In fact, there might still be some leftover filling in my fridge if you'd like to witness it. Also, Carin's wearing my shirt because we made the macarons on maybe the hottest day of the summer and we had to change out of our workout clothes so we could do it for the 'gram... #secretsout


What it looks like... Just shooting for my monogram necklace post! Doesn't my hair look great? That's natural.

What really happened... I'm not wearing a bra. I also made Caroline take this picture 5409438 times at a million different angles because I didn't think it was good enough.


What it looks like... Finally in Rhode Island! Stopped for ice cream and having a great time walking around town with the fam. 

What really happened... I was alone... in the middle of a street... at 9 o'clock at night, when I took this picture. Edited? Nah... Only had to bump up the exposure like 100%.

***

Let me know if you enjoyed this post! I thought it was super fun!!
xoxo

Insta Recap

Hello, hello! I hope you've all had a great week. Today is my last day of field hockey camp, which started on Monday and has been an all day occurrence. To say I have an extreme sunburn would be an understatement, and as much fun as I have had I think I'm definitely ready to wrap it up. Today I wanted to share a few of my recent Insta snaps because I hit 200 posts the other day!


I recently purchased the J. Crew Factory scalloped dress and I am in love. I can dress it up or down, as seen here with converse, and I know it will become a summer staple in my closet!


I've been keeping busy this summer with lots of lunches at the country club with friends and hanging out by the pool with my favorite chicken caesar wraps ;)


After a little shopping spree with my dad, I realized I may or may not have overloaded on stripes. Fortunately, stripes never cease to fail me and you can be sure I'll be donning them all summer long.


Aaand, finally! As I mentioned on Instagram, thank you all for supporting my instagram account! I hit 200 posts this week and could not be more excited.

xoxo

How I Edit My Pictures {For Instagram}

A few people emailed me and a few other people commented on this post asking how I edited my pictures. Thanks to a helpful conversation with my blogger friends, I use an app called VSCO Cam. That's pretty much the only app I use, unless I'm posting a picture with faces and then I might use Aviary for touch-ups. Also, I occasionally use whitagram for resizing pictures, but I don't do any actual editing on that one.

Here's a behind-the-scenes look at my Instagram... The before and afters of what I post!

before + after of instagram

As you can see, I don't revamp my pictures completely when I edit them. For the most part, all I do is crop, add a filter, and maybe fool around with the exposure a little if necessary.

Here's the general process I go through before posting a picture:

1. Find the inspiration - I don't just sit around and take pictures 24/7. I actually have to realize: oh, this is a good moment for a picture, this would make a good shot. 
2. Take the picture - I'm not an amazing photographer whatsoever. I take the pictures on my Nikon, but I still have to snap anywhere between 5 and 10 shots before I find one that's ok. Typically I style the photo a little so it looks how to I want it (ex: the thank you notes on the book; the spoon parallel to the bowl)
3. Upload - This part is kind of annoying because I have to upload the pictures onto the computer, email them to myself, open them on phone, and then I'm finally ready to edit
4. Edit - Like I said, I really only use VSCO. I crop my pictures into squares, usually use F2 for the filter, and then adjust exposure, contrast, the filter, and the temperature as needed.
5. Post - Finally, I can post the picture! The process can take anywhere from 15-30 minutes, but I love the feeling of posting a picture I'm proud of.


How do you edit your pictures?
xoxo